Auto Blocking for High-risk Alerts
Playbook Overview
SecMaster provides a playbook for automatic blocking of high-risk alerts. This playbook can automatically scan high-risk alerts for source IP addresses that are identified by ThreatBook as medium and high risk and block them in the services, such as WAF, CFW, and VPC security groups, where the high-risk alerts have been generated.
The Auto Blocking for High-Risk Alerts playbook has matched the Auto Blocking for High-Risk Alerts workflow.
Prerequisites
- You have enabled access to WAF access logs or WAF attack logs in the workspace in SecMaster. For details, see Enabling Log Access.
- You have available quota for querying indicators in ThreatBook.
Step 1: Configure an Operation Connection
- Log in to the SecMaster console.
- Click
 in the upper left corner of the page and choose Security & Compliance > SecMaster.
 - In the navigation pane on the left, choose Workspaces > Management. In the workspace list, click the name of the target workspace.
Figure 1 Workspace management page

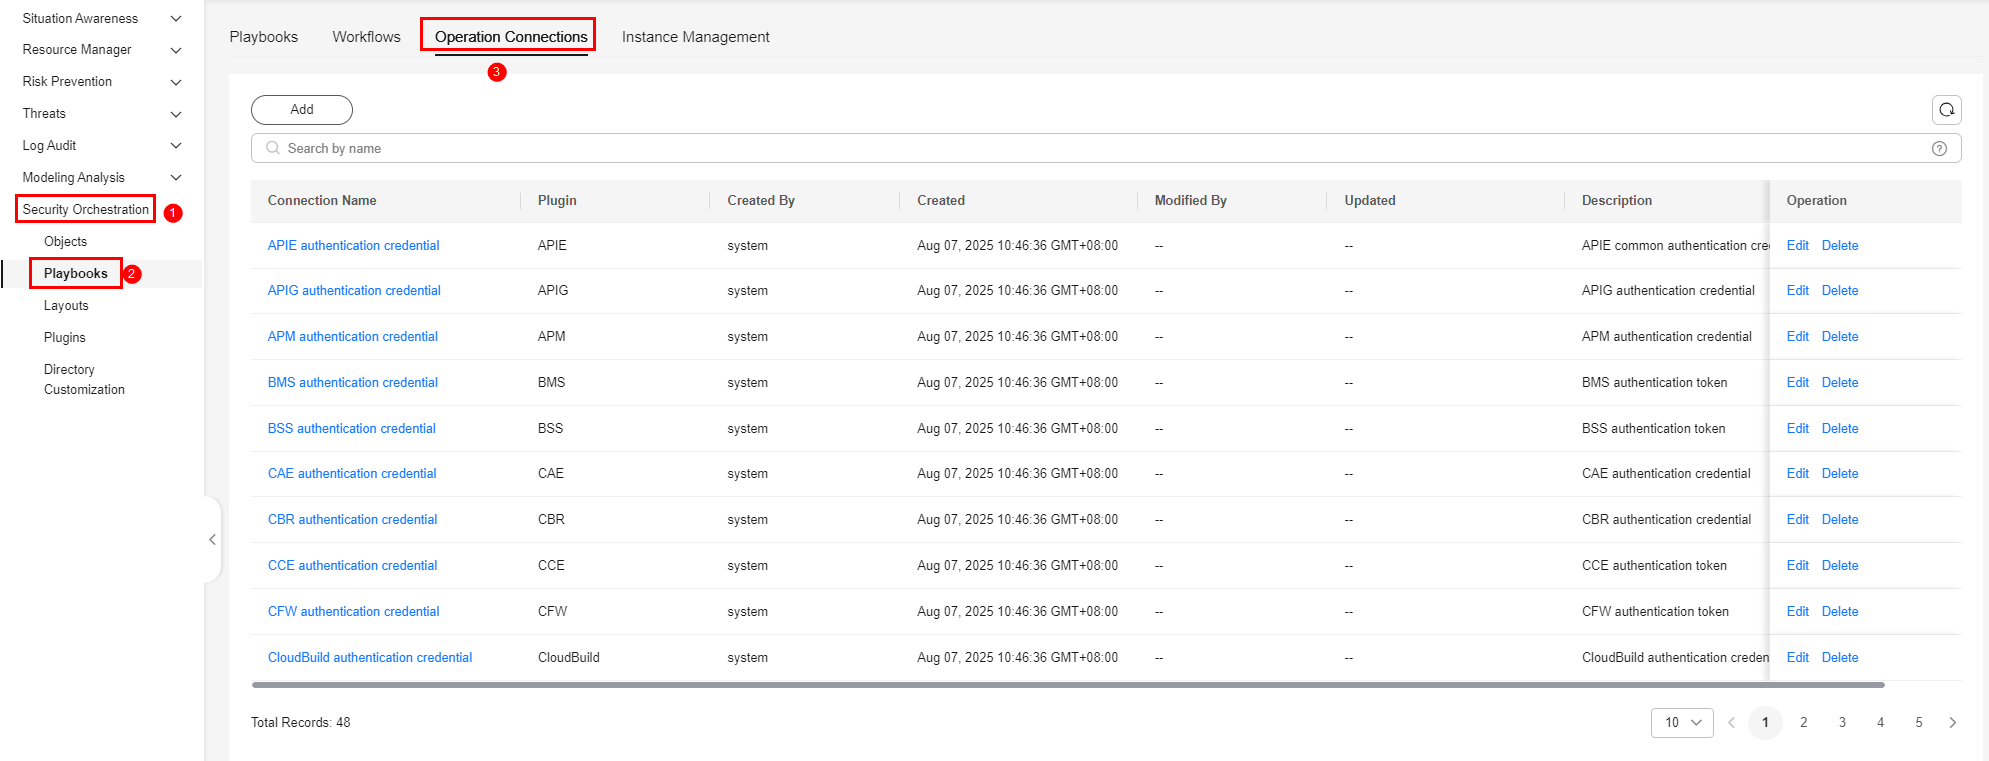
- In the navigation pane on the left, choose . On the displayed page, click the Operation Connections tab.
Figure 2 Operation Connections

- On the Operation Connection tab, click Edit in the Operation column of the row that contains threatbook authentication token.
- On the Edit Operation Connection panel sliding out from the right, configure the token.
- freeApiKey or payApiKey: Set either of them. The value can be obtained after you buy ThreatBook quota.
- redisHost: IP address of your Redis resources. If there are no IP addresses, leave this parameter blank.
- redisPort: Port of your Redis resources. If there are no such ports, leave this parameter blank.
- redisPassword: Passwords of your Redis resources. If there are no such passwords, leave this parameter blank.
- Click OK.
Step 2: Configure and Enable the Playbook
In SecMaster, the initial version (V1) of the Auto Blocking for High-Risk Alerts workflow is enabled by default. You do not need to manually enable it. The initial version (V1) of the Auto Blocking for High-Risk Alerts playbook is also activated by default. To use it, you only need to enable it.
- On the Playbooks page, locate the row that contains the Auto Blocking for High-Risk Alerts playbook and click Enable in the Operation column.
- In the dialog box displayed, select the initial playbook version v1 and click OK.
Implementation Effect
The following uses WAF as an example.
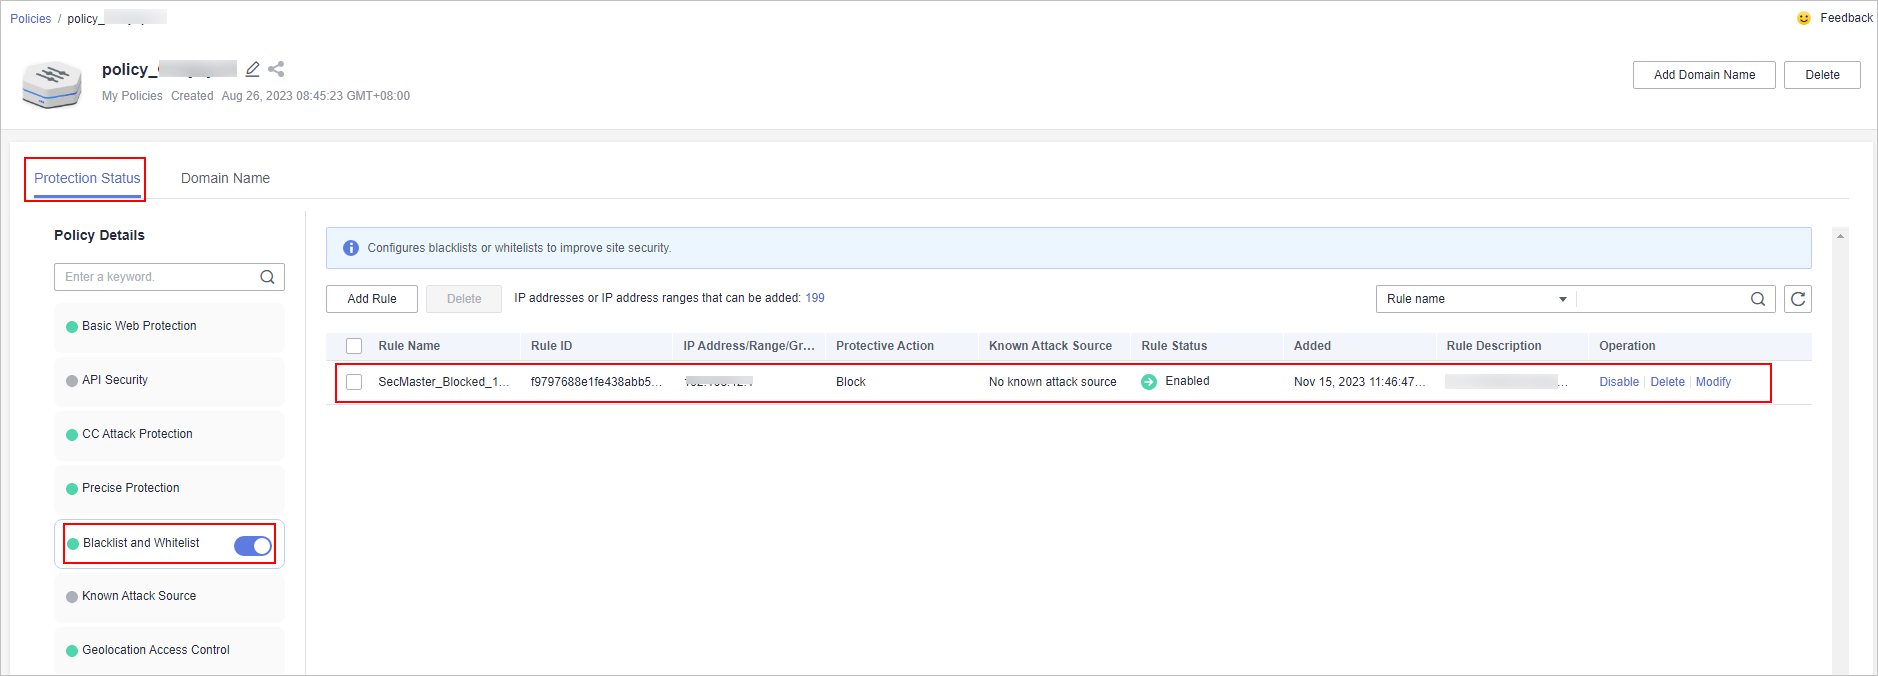
If an IP address is blocked, it will be included in the WAF blacklist. The procedure is as follows:
- Log in to the WAF console, go to the Policies page, and click the name of the target protection policy.
- On the protection policy details page, click Blacklist and Whitelist in the Protection Details area. You can see that the IP address is listed in an address group in the WAF blacklist.
Figure 3 Blacklist and Whitelist

Feedback
Was this page helpful?
Provide feedbackThank you very much for your feedback. We will continue working to improve the documentation.See the reply and handling status in My Cloud VOC.
For any further questions, feel free to contact us through the chatbot.
Chatbot


