
Method 1: Opening a CCE Workload by Creating a Load Balance Channel
- Create a load balance channel.
- Go to the APIG console, and choose Gateways in the navigation pane.
- Choose API Management > API Policies.
- On the Load Balance Channels tab, click Create Load Balance Channel.
- Set the basic information.
Table 1 Basic information parameters Parameter
Description
Name
Enter a load balance channel name. Example: VPC_demo.
Port
Container port of a workload for opening services. Set this parameter to 80, which is the default HTTP port.
Routing Algorithm
Select WRR. This algorithm will be used to forward requests to each of the cloud servers you select in the order of server weight.
Type
Select Microservice.
- Configure microservice information.
Table 2 Microservice configuration Parameter
Description
Microservice Type
Cloud Container Engine (CCE) is always selected.
Cluster
Select the created cluster.
Namespace
Select a namespace in the cluster. In this example, select default.
Workload Type
Select Deployment. This parameter must be the same as the type of the created workload.
Service Label Key
Select the pod label app and its value deployment-demo of the created workload.
Service Label Value
- Configure a server group.
Table 3 Server group configuration Parameter
Description
Server Group Name
Enter server_group_v1.
Weight
Enter 1.
Backend Service Port
Enter 80. This must be the same as the container port in the workload.
Description
Enter "Server group with version v1".
Tag
Select the pod label version=v1 of the created workload.
- Configure health check.
Table 4 Health check configuration Parameter
Description
Protocol
Default: TCP.
Check Port
Backend server port in the channel.
Healthy Threshold
Default: 2. This is the number of consecutive successful checks required for a cloud server to be considered healthy.
Unhealthy Threshold
Default: 5. This is the number of consecutive failed checks required for a cloud server to be considered unhealthy.
Timeout (s)
Default: 5. This is the timeout used to determine whether a health check has failed.
Interval (s)
Default: 10. This is the interval between consecutive checks.
- Click Finish.
In the load balance channel list, click a channel name to view details.
- Set the basic information.
- Open an API.
- Create an API group.
- Choose API Management > API Groups.
- Click Create API Group, and choose Create Directly.
- Configure group information and click OK.
- Create an API and bind the preceding load balance channel to it.
- Click the group name to go to the details page. On the APIs tab, choose Create API > Create API.
- Configure frontend information and click Next.
Table 5 Frontend configuration Parameter
Description
API Name
Enter an API name.
Group
The group the API belongs to. Select the preceding API group.
URL
- Method: Request method of the API. Set this parameter to ANY.
- Protocol: Request protocol of the API. Set this parameter to HTTPS.
- Subdomain Name: The system automatically allocates a subdomain name to each API group for internal testing. The subdomain name can be accessed 1,000 times a day.
- Path: Path for requesting the API.
Gateway Response
Select a response to be displayed if the gateway fails to process an API request. Default: default.
Matching
Select Prefix match.
Authentication Mode
API authentication mode. Select None. (None: Not recommended for actual services. All users will be granted access to the API.)
- Configure the backend information and click Next.
Table 6 Parameters for defining an HTTP/HTTPS backend service Parameter
Description
Load Balance Channel
Determine whether the backend service will be accessed using a load balance channel. For this example, select Configure.
URL
- Method: Request method of the API. Set this parameter to ANY.
- Protocol: Set this parameter to HTTP.
- Load Balance Channel: Select the created channel.
- Path: Path of the backend service.
- Define the response and click Finish.
- Debug the API.
On the APIs tab, click Debug. Click the Debug button in red background. If the status code 200 is returned in the response result, the debugging is successful. Then go to the next step. Otherwise, rectify the fault by following the instructions provided in Error Codes.
- Publish the API.
On the APIs tab, click Publish Latest Version, retain the default option RELEASE, and click OK. When the exclamation mark in the upper left of the Publish button disappears, the publishing is successful. Then go to the next step. Otherwise, rectify the error indicated in the error message.
- Create an API group.
- Call the API.
- Bind independent domain names to the group of this API.
On the group details page, click the Group Information tab. The debugging domain name is only used for development and testing and can be accessed 1,000 times a day. Bind independent domain names to expose APIs in the group.
Click Bind Independent Domain Name to bind registered public domain names. For details about how to bind a domain name, see Binding a Domain Name.
- Copy the URL of the API.
On the APIs tab, copy the API URL. Open a browser and enter the URL. When the defined success response is displayed, the invocation is successful.
Figure 1 Copying the URL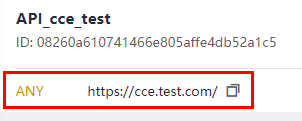
Now, the CCE workload is opened by creating a load balance channel.
- Bind independent domain names to the group of this API.
Feedback
Was this page helpful?
Provide feedbackThank you very much for your feedback. We will continue working to improve the documentation.See the reply and handling status in My Cloud VOC.
For any further questions, feel free to contact us through the chatbot.
Chatbot


