
Mounting an NFS File System to ECSs (Windows)
After creating a file system, you need to mount the file system to cloud servers so that they can share the file system.
This section uses Windows Server 2012 as the example OS to describe how to mount an NFS file system. For other versions, perform the steps based on the actual situation.
In this section, ECSs are used as example servers. Operations on BMSs are the same as those on ECSs.
Prerequisites
- You have created a file system and have obtained the mount point of the file system.
- At least one ECS that is in the same VPC as the file system is available.
Procedure
- Log in to the management console using a cloud account.
- Log in to the management console and select a region and a project.
- Choose Compute > Elastic Cloud Server to go to the ECS console.
- On the ECS console, log in to the ECS running Windows Server 2012.
- Install the NFS client.
- Click Server Manager in the lower left corner. The Server Manager window is displayed, as shown in Figure 1.
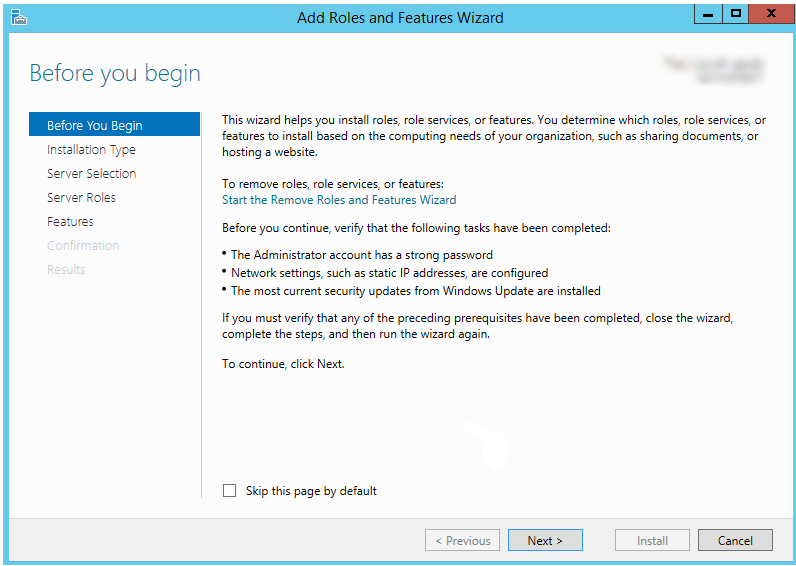
- Click Add Roles and Features. See Figure 2.
- Click Next as prompted. On the Server Roles page, select Server for NFS, as shown in Figure 3.
- Click Next. In the Features page, select Client for NFS and click Next, as shown in Figure 4. Confirm the settings and then click Install. If you install the NFS client for the first time, after the installation is complete, restart the client and log in to the ECS again as prompted.
- Modify the NFS transfer protocol.
- Run the following command in the Command Prompt of the Windows Server 2012 (X is the drive letter of the free disk). Select the ECS that is in the same VPC as the file system to mount the file system.

- Free drive letter of the disk: A drive letter that is not in use, such as drive letter E or X.
You can move the cursor to the mount point and click
 next to the mount point to copy it. If the information shown in Figure 8 is displayed, the mount is successful.
 - After the file system is mounted successfully, you can view the mounted file system on the This PC window, as shown in Figure 9.
If the mounting fails or times out, rectify the fault by referring to Troubleshooting.
To distinguish different file systems mounted on an ECS, you can rename file systems by right-clicking a file system and choose Rename.


Troubleshooting
If a file system is mounted to a Linux ECS and a Windows ECS, on the Windows ECS, you cannot write data to the files created by the Linux ECS. To address this problem, modify the registry and change both UID and GID values to 0 for NFS accesses from Windows. This section uses Windows Server 2012 as an example. Do as follows:
- Choose Start > Run and enter regedit to open the registry.
- Enter the HKEY_LOCAL_MACHINE\SOFTWARE\Microsoft\ClientForNFS\CurrentVersion\Default directory. See Figure 10.
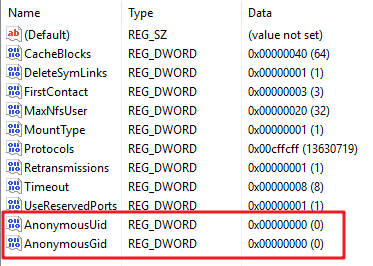
- Right-click the blank area and choose New > DWORD Value from the shortcut menu. Set AnonymousUid and AnonymousGid to 0. Figure 11 shows a successful operation.
- After modifying the registry, restart the server for the modification to take effect.

Feedback
Was this page helpful?
Provide feedbackThank you very much for your feedback. We will continue working to improve the documentation.See the reply and handling status in My Cloud VOC.
For any further questions, feel free to contact us through the chatbot.
Chatbot


