
Help Center/ Virtual Private Network/ User Guide/ P2C VPN/ P2C VPN Client Management/ Configuring a macOS Client
Updated on 2026-05-14 GMT+08:00
Configuring a macOS Client
Client Version Requirements
Table 1 lists the client versions supported by macOS.
OpenVPN Connect
- Visit the OpenVPN official website, and download the OpenVPN Connect installer based on the hardware of your device.
- Install OpenVPN Connect as prompted.
- Download the client configuration file.
- Log in to the management console.
- Click
 in the upper left corner and select the desired region and project.
 - Click
 in the upper left corner, and choose .
 - In the navigation pane on the left, choose .
- Click the P2C VPN Gateways tab, and click Download Client Configuration in the Operation column of the target VPN gateway.
The downloaded client configuration file is client_config.zip.
- Decompress client_config.zip to a specified directory, for example, D:\.
After the decompression, the client_config.ovpn and client_config.conf files are generated.
- Open the client_config.ovpn file using TextEdit.
- Add the client certificate and private key to the file. Enter the client certificate content and the corresponding private key in between <cert></cert> and <key></key> tags, respectively.
<cert>
-----BEGIN CERTIFICATE-----
Client certificate content
-----END CERTIFICATE-----
</cert>

<key>
-----BEGIN PRIVATE KEY-----
Client private key
-----END PRIVATE KEY-----
</key>
- Save the .ovpn configuration file.
- Start the OpenVPN Connect client.
- Import the .ovpn configuration file and enter the configuration information.
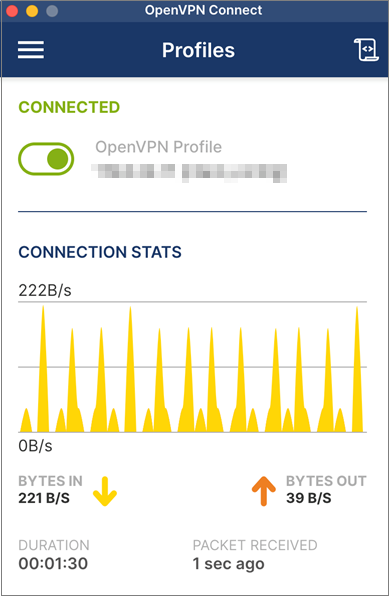
- Establish a VPN connection. If information similar to the following is displayed, the connection is successfully established.Figure 1 Connection established
Tunnelblick
- Download Tunnelblick from the official website.
Download the software of a required release. An official release is recommended. You are advised to download the software in DMG format.
- Install Tunnelblick as prompted.
- Download the client configuration file.
- Log in to the management console.
- Click in the upper left corner and select the desired region and project.
- Click in the upper left corner, and choose .
- In the navigation pane on the left, choose .
- Click the P2C VPN Gateways tab, and click Download Client Configuration in the Operation column of the target VPN gateway.
The downloaded client configuration file is client_config.zip.
- Decompress client_config.zip to a specified directory, for example, D:\.
After the decompression, the client_config.ovpn and client_config.conf files are generated.
- Open the client_config.ovpn file using TextEdit.
- Add the client certificate and private key to the file. Enter the client certificate content and the corresponding private key in between <cert></cert> and <key></key> tags, respectively.
<cert>
-----BEGIN CERTIFICATE-----
Client certificate content
-----END CERTIFICATE-----
</cert>

<key>
-----BEGIN PRIVATE KEY-----
Client private key
-----END PRIVATE KEY-----
</key>
- Comment out disable-dco.
- Press Command+F to search for and locate disable-dco.
- Enter # in front of the line where disable-dco is located to comment out the line.
...
...
# disable-dco
...
...
- Save the .ovpn configuration file.
- Start the Tunnelblick client.
- Import the .ovpn configuration file.
- Establish a VPN connection.
Parent topic: P2C VPN Client Management
Feedback
Was this page helpful?
Provide feedbackThank you very much for your feedback. We will continue working to improve the documentation.
The system is busy. Please try again later.


