
Help Center/ ModelArts/ ModelArts User Guide (Standard)/ Development Environments/ Using a Notebook Instance Remotely with SSH
Updated on 2025-05-28 GMT+08:00
Using a Notebook Instance Remotely with SSH
This section describes how to use PuTTY to remotely log in to a notebook instance on the cloud in the Windows environment.
Prerequisites
- You have created a notebook instance with remote SSH enabled and whitelist configured. Ensure that the instance is running. For details, see Creating a Notebook Instance.
- The address and port number of the development environment are available. To obtain this information, go to the notebook instance details page. Figure 1 Instance details page

- The key pair is available.
A key pair is automatically downloaded after you create it. Securely store your key pair. If an existing key pair is lost, create a new one.
Step 1 Install the SSH Tool
Download and install the SSH remote access tool, for example, PuTTY.
Step 2 Use PuTTYgen to Convert the .pem Key Pair File to a .ppk Key Pair File
- Download PuTTYgen and double-click it to run it.
- Click Load to load the .pem key file created and saved during notebook instance creation.
- Click Save private key to save the generated .ppk file. The file name can be customized, for example, key.ppk. Figure 2 Converting the .pem key pair file to a .ppk key pair file

Step 3 Use SSH to Connect to a Notebook Instance
- Run PuTTY.
- Click Session and set the following parameters:
- Host Name (or IP address): address for accessing the in-cloud notebook instance. Obtain the address on the page providing detailed information of the target notebook instance .
- Port: port number for accessing the in-cloud notebook instance. Obtain the port number on the page providing detailed information of the target notebook instance, for example, 32701.
- Connection type: Choose SSH.
- Saved Sessions: task name, which can be clicked for remote access when you use PuTTY next time
Figure 3 Configuring Session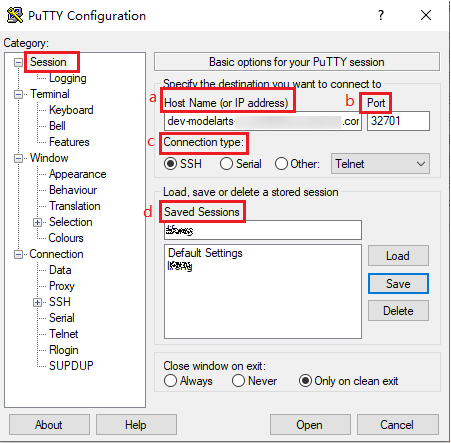
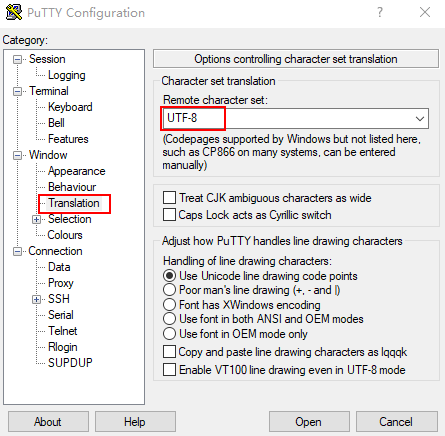
- Choose Window > Translation and select UTF-8 from the drop-down list box in the Remote character set area. Figure 4 Setting the character format
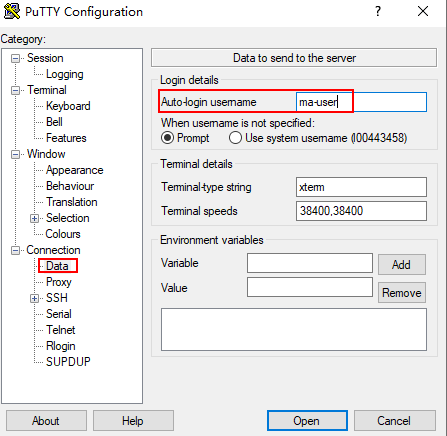
- Choose Connection > Data and enter ma-user for Auto-login username. Figure 5 Entering a username
- Choose Connection > SSH > Auth, click Browse, and select the .ppk file generated in step 2.
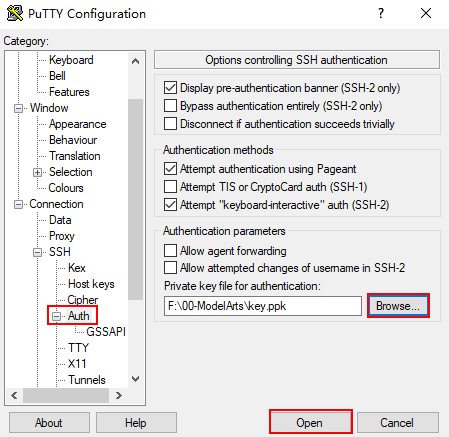
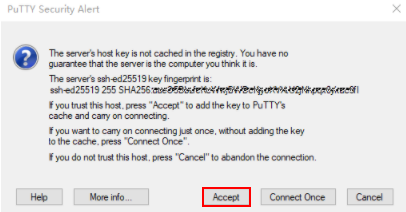
- Click Open. If you are logging in to the instance for the first time, PuTTY displays a security warning dialog box, asking if you want to accept the instance security certificate. Click Accept to save the certificate to your local registry. Figure 6 Asking if you want to accept the instance security certificate
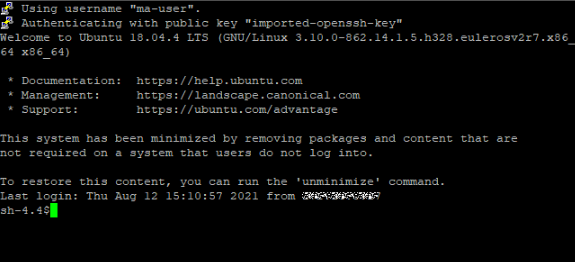
- Connect to the notebook instance. Figure 7 Connecting to a notebook instance
Parent topic: Development Environments
Feedback
Was this page helpful?
Provide feedbackThank you very much for your feedback. We will continue working to improve the documentation.
The system is busy. Please try again later.


