
Saving a Notebook Instance
To save a notebook environment image, do as follows: Create a notebook instance using a preset image, install custom software and dependencies on the base image, and save the running instance as a container image. After the image is saved, the default working directory is the / path in the root directory.
In the saved image, the installed dependencies are retained. The data stored in home/ma-user/work for persistent storage will not be stored. When you use VS Code for remote development, the plug-ins installed on the Server are retained.

If the image fails to be saved, view the event on the notebook instance details page.
The image to be saved should not be larger than 35 GB and there should be no more than 125 layers. Otherwise, the image may fail to be saved. For details, see Space Allocation for Container Engines.
- If a dedicated resource pool is used, log in to the ModelArts console. In the navigation pane on the left, choose AI Dedicated Resource Pools > Elastic Clusters. On the displayed page, configure the container engine size as needed. For details, see Resizing a Standard Dedicated Resource Pool.
- If the fault persists, contact technical support.
Prerequisites
The notebook instance is in Running state.
Saving an Image
- In the notebook instance list, select the target notebook instance and choose Save Image from the More drop-down list in the Operation column. The Save Image dialog box is displayed.
- In the Save Image dialog box, configure parameters. Click OK to save the image.
Choose an organization from the Organization drop-down list. If no organization is available, click Create on the right to create one.
Users in an organization can share all images in the organization.
- The image will be saved as a snapshot, and it will take about 5 minutes. During this period of time, do not perform any operations on the instance. Figure 1 Saving as a snapshot


The time required for saving an image as a snapshot will be counted in the instance running duration. If the instance running duration expires before the snapshot is saved, saving the image will fail.
- After the image is saved, the instance status changes to Running. View the image on the Image Management page.
- Click the name of the image to view its details.
Using a Custom Image to Create a Notebook Instance
The images saved from a notebook instance can be viewed on the Image Management page. You can use these images to create new notebook instances, which inherit the software configurations of the original notebook instances.
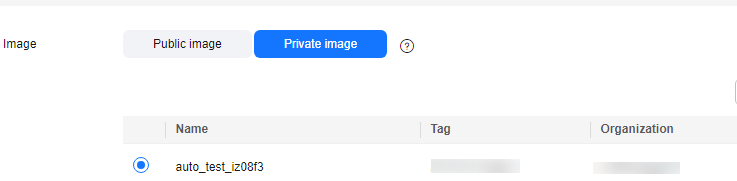
Method 1: On the Create Notebook page, click Private Image and select the saved image.
Method 2: On the Image Management page, click the target image to access its details page. Then, click Create Notebook.
Which Data Can Be Saved When I Save an Image?
- Data that can be saved: Files and directories that are statically added to images during container building,
for example, dependencies and the /home/ma-user directory are saved in the image environment.
- Data that cannot be saved: Mounting directories or data volumes that are dynamically connected to the host during container startup. You can run the df -h command to view the mounted dynamic directories. Data that is not in the / path will not be saved.
For example, data that is persistently stored in home/ma-user/work and data that is dynamically mounted to /data is not saved.
Feedback
Was this page helpful?
Provide feedbackThank you very much for your feedback. We will continue working to improve the documentation.


