

Changing the VPC Subnet of an MRS Cluster
A subnet is a unique CIDR block with a range of IP addresses in a VPC. You can divide a VPC into several subnets to help you plan IP addresses. All resources in a VPC must be deployed on subnets. Subnets in a VPC cannot overlap with each other.
- By default, all instances in different subnets of the same VPC can communicate with each other and the subnets can be located in different AZs.
- A cloud resource and its subnet can be in different AZs. For example, a cloud server in AZ 1 can use a subnet in AZ 3. If AZ 3 becomes faulty, the cloud server in AZ 1 can still use the subnet in AZ 3, and your services on the cloud server are not interrupted.
A network ACL protects an entire subnet. You can add inbound and outbound rules for a network ACL and associate a subnet with the network ACL. In this way, all instances in the subnet are protected by the network ACL. For details about how to configure network ACL outbound rules, see Configuring Network ACL Outbound Rules.

When creating an MRS cluster, you can manually select an existing subnet. After an MRS cluster is created, if IP addresses in the current subnet are insufficient, you can change the subnet to another one in the same VPC as the current cluster to increase available subnet IP addresses.
Changing a subnet does not affect the IP addresses or subnets of existing nodes.
Changing a Subnet When No Network ACL Is Associated
- Log in to the MRS console.
- On the Active Clusters page, select a running target cluster and click its name to go to the cluster details page.
- In the Network Information area, click Change Subnet on the right of Default Subnet.
- Select the target subnet and click OK.
If no subnet is available, click Create Subnet to create a subnet first.
Changing a Subnet When a Network ACL Is Associated
- Log in to the MRS console.
- On the Active Clusters page, select a running target cluster and click its name to go to the cluster details page.
- In the Network Information area, view VPC.
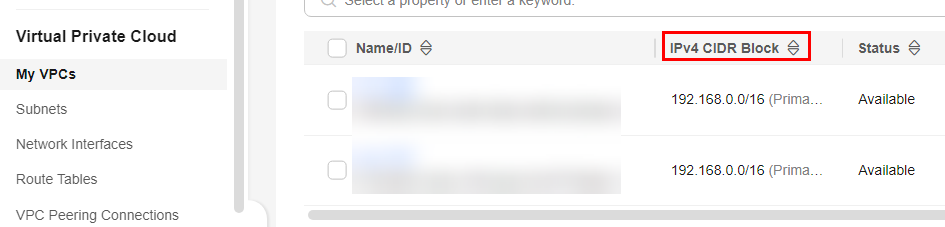
- Log in to the VPC console. In the navigation pane on the left, choose My VPCs to obtain the IPv4 CIDR block of the target VPC identified in Step 3. Figure 2 Obtaining the IPv4 CIDR block
- In the navigation pane on the left, choose Access Control > Network ACLs, and click the name of the network ACL associated with the default and new subnets. Then, click the Inbound Rules tab.
If both the default and new subnets are associated with a network ACL, add inbound rules to the network ACL by referring to Step 6 to Step 8.
- On the Inbound Rules page, choose More > Insert Rule Above in the Operation column.
- Add a network ACL rule. Set Action to Allow, Source to the VPC IPv4 CIDR block obtained in Step 4, and retain the default values for other parameters.
- Click OK.
If you do not want to allow access from all IPv4 CIDR blocks of the VPC, add the IPv4 CIDR blocks of the default and new subnets by performing Step 9 to Step 13. If you have added rules for the IPv4 CIDR block of the VPC, no action is required.
- Log in to the MRS console.
- On the Active Clusters page, select a running target cluster and click its name to go to the cluster details page.
- In the Network Information area, click Change Subnet on the right of Default Subnet.
- Obtain the IPv4 CIDR blocks of the default and new subnets.
In this case, you do not need to click OK displayed in the Change Subnet dialog box. Otherwise, the default subnet will be updated to the new subnet, thereby making it difficult to query the IPv4 CIDR block of the default subnet. Exercise caution when performing this operation.
- Add the IPv4 CIDR blocks of the default and target subnets to the inbound rules of the network ACL bound to the two subnets by referring to Step 5 to Step 8.
- On the cluster dashboard page of the MRS console, click Change Subnet next to Default Subnet in the Network Information area.
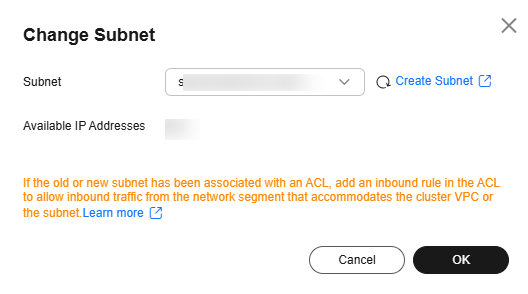
- Select the target subnet and click OK. Figure 3 Selecting the target subnet
Helpful Links
- Perform the following operations to configure an outbound rule for the network ACL:
- Method 1
Allow all outbound traffic. This method ensures that clusters can be created and used properly.
- Method 2
Allow the mandatory outbound rules that can ensure the successful creation of clusters. You are not advised to use this method because created clusters may not run properly due to absent outbound rules. If the preceding problem occurs, contact O&M personnel.
Similar to the example provided in method 1, set Action to Allow and add the outbound rules whose destinations are the address with Secure Communications enabled, NTP server address, OBS server address, OpenStack address, and DNS server address, respectively.
- Method 1


