Managing GaussDB Tags
Scenarios
Tag Management Service (TMS) enables you to use tags on the management console to manage resources. TMS works with other cloud services to manage tags. TMS manages tags globally. Other cloud services manage only their own tags.
You can use unified tags to manage various resources and use custom tags to define different DB instance categories. This section describes how to edit and delete tags.
Precautions
- You are advised to configure predefined tags on the TMS console.
- A tag consists of a key and value. You can add only one value for each key.
- A maximum of 20 tags can be added for an instance.
Adding Tags
- Log in to the management console.
- Click
 in the upper left corner and select a region and project.
 - Click
 in the upper left corner of the page and choose .
 - On the Instances page, click the name of the target instance to go to the Basic Information page.
- In the navigation pane, choose Tags. On the displayed page, click Add Tag. In the displayed dialog box, enter a tag key and value, and click OK.
- A tag key can contain up to 128 characters. It cannot start with _sys_ or a space, and cannot end with a space. Only letters, digits, spaces, and the following special characters are allowed: _.:=+-@
- A tag value can contain up to 255 characters. Only letters, digits, spaces, and the following special characters are allowed: _.:/=+-@
- View and manage the tag on the Tags page.
Editing a Tag
- Log in to the management console.
- Click
 in the upper left corner and select a region and project.
 - Click
 in the upper left corner of the page and choose .
 - On the Instances page, click the name of the target instance to go to the Basic Information page.
- In the navigation pane on the left, click Tags, locate the tag to be edited, and click Edit in the Operation column.
- In the displayed dialog box, enter a tag value and click OK.
- Only the tag value can be edited.
- The tag value can contain 0 to 43 characters. Only letters, digits, at signs (@), hyphens (-), underscores (_), and periods (.) are allowed.
- View and manage the tag on the Tags page.
Deleting a Tag
- Log in to the management console.
- Click
 in the upper left corner and select a region and project.
 - Click
 in the upper left corner of the page and choose .
 - On the Instances page, click the name of the target instance to go to the Basic Information page.
- In the navigation pane on the left, choose Tags. On the displayed page, locate the tag to be deleted, and click Delete.
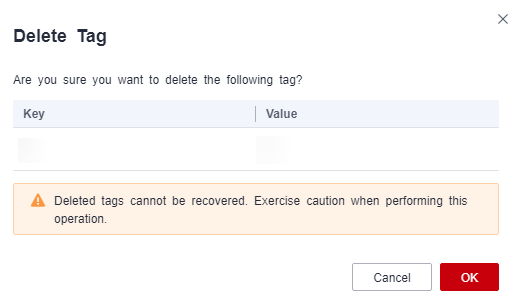
- In the displayed dialog box, click OK.
Figure 1 Deleting a tag

- Check that the tag is no longer displayed on the Tags page.
Feedback
Was this page helpful?
Provide feedbackThank you very much for your feedback. We will continue working to improve the documentation.


