
Creating a Standard Dedicated Resource Pool
This section describes how to create a standard dedicated resource pool.
Prerequisites
- A VPC is available.
- A subnet is available.
Step 1: Create a Network
ModelArts networks are backed by VPCs and used for interconnecting nodes in a ModelArts resource pool. You can only configure the name and CIDR block for a network. To ensure that there is no IP address segment in the CIDR block overlapped with that of the VPC to be accessed, multiple CIDR blocks are available for you to select. A VPC provides a logically isolated virtual network for your instances. You can configure and manage the network as required. VPC provides logically isolated, configurable, and manageable virtual networks for cloud servers, cloud containers, and cloud databases. It helps you improve cloud service security and simplify network deployment.
- Log in to the ModelArts management console. In the navigation pane on the left, choose Dedicated Resource Pools > Elastic Clusters.
- Click the Network tab and click Create.
- In the Create Network dialog box, set parameters.
- Network Name: customizable name
- CIDR Block: You can select Preset or Custom. Recommended CIDR blocks for a custom network: 10.0.0.0/8-24, 172.16.0.0/12-24, and 192.168.0.0/16-24. The subnet mask ranges from 8 to 28.
Figure 1 Creating a network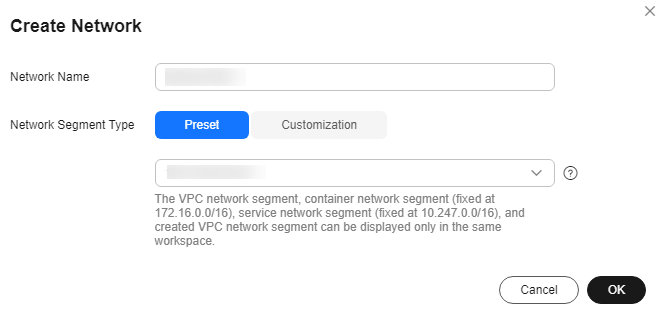

- Each user can create a maximum of 15 networks.
- Ensure there is no IP address segment in the CIDR block overlaps that of the VPC to be accessed. The CIDR block cannot be changed after the network is created. Possible conflict CIDR blocks are as follows:
- Your VPC CIDR block
- Container CIDR block (consistently to be 172.16.0.0/16)
- Service CIDR block (consistently to be 10.247.0.0/16)
- Confirm the settings and click OK.
(Optional) Step 2: Interconnect with a VPC
VPC interconnection allows you to use resources across VPCs, improving resource utilization.
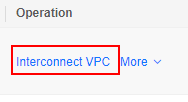
- On the Network page, click Interconnect VPC in the Operation column of the target network.
Figure 2 Interconnecting the VPC
- In the displayed dialog box, click the button on the right of Interconnect VPC, and select an available VPC and subnet from the drop-down lists.
The peer network to be interconnected cannot overlap with the current CIDR block.
Figure 3 Parameters for interconnecting a VPC with a network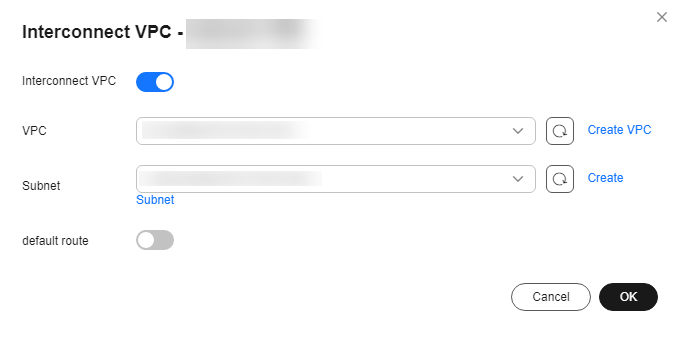
- If no VPC is available, click Create VPC on the right to create a VPC.
- If no subnet is available, click Create Subnet on the right to create a subnet.
- A VPC can interconnect with at most 10 subnets. To add a subnet, click the plus sign (+).
- To enable a dedicated resource pool to access the public network through a VPC, create a SNAT in the VPC, as the public network address is unknown. After the VPC is interconnected, by default, the public address cannot be forwarded to the SNAT of your VPC. To add a default route, contact technical support. Then, when you interconnect with a VPC, ModelArts 0.0.0.0/0 is used as the default route. In this case, you do not need to submit a service ticket. Add the default route for network configuration.
Step 3: Create a Standard Dedicated Resource Pool
- Log in to the ModelArts console. In the navigation pane on the left, choose Dedicated Resource Pools > Elastic Clusters.
- In the Standard Resource Pool tab, click Buy AI Dedicated Cluster. On the displayed page, configure the parameters as follows.
Table 1 Parameters Parameter
Sub-Parameter
Description
Name
-
Enter a name.
Only lowercase letters, digits, and hyphens (-) are allowed. The value must start with a lowercase letter and cannot end with a hyphen (-).
Description
-
Enter a brief description of the dedicated resource pool.
Billing Modes
-
You can select Pay-per-use.
Job Type
-
Select job types supported by the resource pool based on service requirements.
DevEnviron, Training Job, and Inference Service are supported.
Network
-
Network in which the target service instance is deployed. The instance can exchange data with other cloud service resources in the same network.
Select a network from the drop-down list box. If no network is available, click Create on the right to create a network. For details about how to create a network, see Step 1: Create a Network.
Instance Specification Management
Instance Specifications Type
Select required specifications. Due to system loss, the available resources are fewer than specified. After a dedicated resource pool is created, view the available resources in the Nodes tab on the details page.
Contact your account manager to request resource specifications (such as Ascend) in advance. They will enable the specifications within one to three working days. If there is no account manager, submit a service ticket.
AZ
You can select Automatically allocated or Specifies AZ. An AZ is a physical region where resources use independent power supplies and networks. AZs are physically isolated but interconnected over an intranet.
- Automatically allocated: AZs are automatically allocated.
- Specifies AZ: Specify AZs for resource pool nodes. To ensure system disaster recovery, deploy all nodes in the same AZ. You can set the number of instances in an AZ.
Instances
Select the number of instances in a dedicated resource pool. More instances mean higher computing performance.
If AZ Allocation is set to Manual, you do not need to configure Instances.
NOTE:It is a good practice to create no more than 30 instances at a time. Otherwise, the creation may fail due to traffic limiting.
For certain specifications, you can purchase instances by rack. The instances you purchase is the number of racks multiplied by rack(6 node). Purchasing a full rack allows you to isolate tasks physically, preventing communication conflicts and maintaining linear computing performance as task scale increases. All nodes in a rack must be created or deleted together.
Advanced Configuration
After this function is enabled, you can set the container engine space size and OS.
You must enter an integer for the container engine space. It cannot be less than 50 GB, which is the default and minimum value. The maximum value depends on the specifications. To see the valid values, check the console prompt. Customizing the container engine space does not increase costs.
Custom Driver
-
Disabled by default. Some GPU and Ascend resource pools allow custom driver installation. The driver is automatically installed in the cluster by default. Enable this function if you need to specify the driver version.
GPU/Ascend Driver
-
This parameter is displayed if Custom Driver is enabled. You can select a GPU or Ascend driver. The value depends on the driver you choose.
Advanced Options
-
Select Configure Now to set the tag information, CIDR block, cluster specifications, and controller node distribution.
CIDR block
-
You can select Default or Custom.
- Default: The system randomly allocates an available CIDR block to you, which cannot be modified after the resource pool is created. For commercial use, customize your CIDR block.
- Custom: You need to customize Kubernetes container and Kubernetes service CIDR blocks.
- K8S Container Network: used by the container in a cluster, which determines how many containers there can be in a cluster. The value cannot be changed after the resource pool is created.
- Kubernetes Service CIDR Block: CIDR block for services used by containers in the same cluster to access each other. The value determines the maximum number of Services you can create. The value cannot be changed after the cluster is created.
Cluster Specifications
-
Cluster Scale: maximum number of nodes that can be managed by the cluster. After the creation, the cluster can be scaled out but cannot be scaled in.
You can select Default or Custom.
Master Distribution
-
Distribution locations of controller nodes. You can select Random or Custom.
- Random: AZs of controller nodes are randomly allocated to improve DR capabilities. If the number of available AZs is less than the number of nodes to be created, the nodes will be created in the AZs with sufficient resources to preferentially ensure cluster creation. In this case, AZ-level DR may not be ensured.
- Custom: Select AZs for controller nodes.
Distribute controller nodes in different AZs for disaster recovery.
- Click Submit.
- After a resource pool is created, its status changes to Running. Only when the number of available nodes is greater than 0, tasks can be delivered to this resource pool.
- Hover over Creating to view the details about the creation process. Click View Details to go the operation record page.
- You can view the task records of the resource pool by clicking Records in the upper left corner of the resource pool list.
FAQs
What if I choose a flavor for a dedicated resource pool, but get an error message saying no resource is available?
The flavors of dedicated resources change based on real-time availability. Sometimes, you might choose a flavor on the purchase page, but it is sold out before you pay and create the resource pool. This causes the resource pool creation to fail.
You can try a different flavor on the creation page and create the resource pool again.
Q: Why cannot I use all the CPU resources on a node in a resource pool?
Resource pool nodes have systems and plug-ins installed on them. These take up some CPU resources. For example, if a node has 8 vCPUs, but some of them are used by system components, the available resources will be fewer than 8 vCPUs.
You can check the available CPU resources by clicking the Nodes tab on the resource pool details page, before you start a task.
Feedback
Was this page helpful?
Provide feedbackThank you very much for your feedback. We will continue working to improve the documentation.


