
Help Center/
Cloud Firewall/
User Guide/
CFW Protection/
Enabling VPC Border Traffic Protection/
VPC Mode/
Creating a Firewall (VPC Mode)
Updated on 2025-09-25 GMT+08:00
Creating a Firewall (VPC Mode)
A VPC border firewall can collect statistics on the traffic between VPCs, helping you detect abnormal traffic. This section describes how to create a VPC border firewall.
Constraints
- Only the professional edition supports VPC border firewalls.
Creating a Firewall (VPC Mode)
- Log in to the CFW console.
- Click
 in the upper left corner of the management console and select a region or project.
 - (Optional) Switch to another firewall instance. Select a firewall from the drop-down list in the upper left corner of the page.
- In the navigation pane, choose Assets > Inter-VPC Border Firewalls.
- Click Create Inter-VPC Firewall.
- Set Route type to VPC, and click Next.
- Configure a CIDR block. An inspection VPC will be automatically created by default.
Figure 1 Network planning
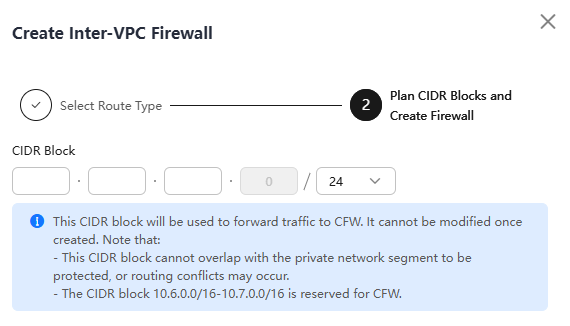
Pay attention to the following restrictions during network planning:
- After a firewall is created, its CIDR block cannot be modified.
- The CIDR block must meet the following requirements:
- Only private network address segments (10.0.0.0/8, 172.16.0.0/12, and 192.168.0.0/16) are supported. Otherwise, route conflicts may occur in public network access scenarios, such as SNAT.
- The CIDR block 10.6.0.0/16-10.7.0.0/16 is reserved for CFW and cannot be used.
- This CIDR block cannot overlap with the private CIDR block to be protected, or routing conflicts and protection failures may occur.
- Click OK.
Follow-up Operations
After the firewall is created, associate the VPC with the firewall by referring to Associating a Protected VPC with the Firewall.
Feedback
Was this page helpful?
Provide feedbackThank you very much for your feedback. We will continue working to improve the documentation.
The system is busy. Please try again later.


