

Updated on 2025-04-21 GMT+08:00
Resizing Disks and Partitions for Target Servers
In a server migration workflow, if the system detects that the disk capacity reduction has been performed on a target server, the workflow will be paused, and you need to go to the SMS console to resize disks and partitions for the target server.
Procedure
- Sign in to the SMS console.
- In the navigation pane on the left, choose Servers.
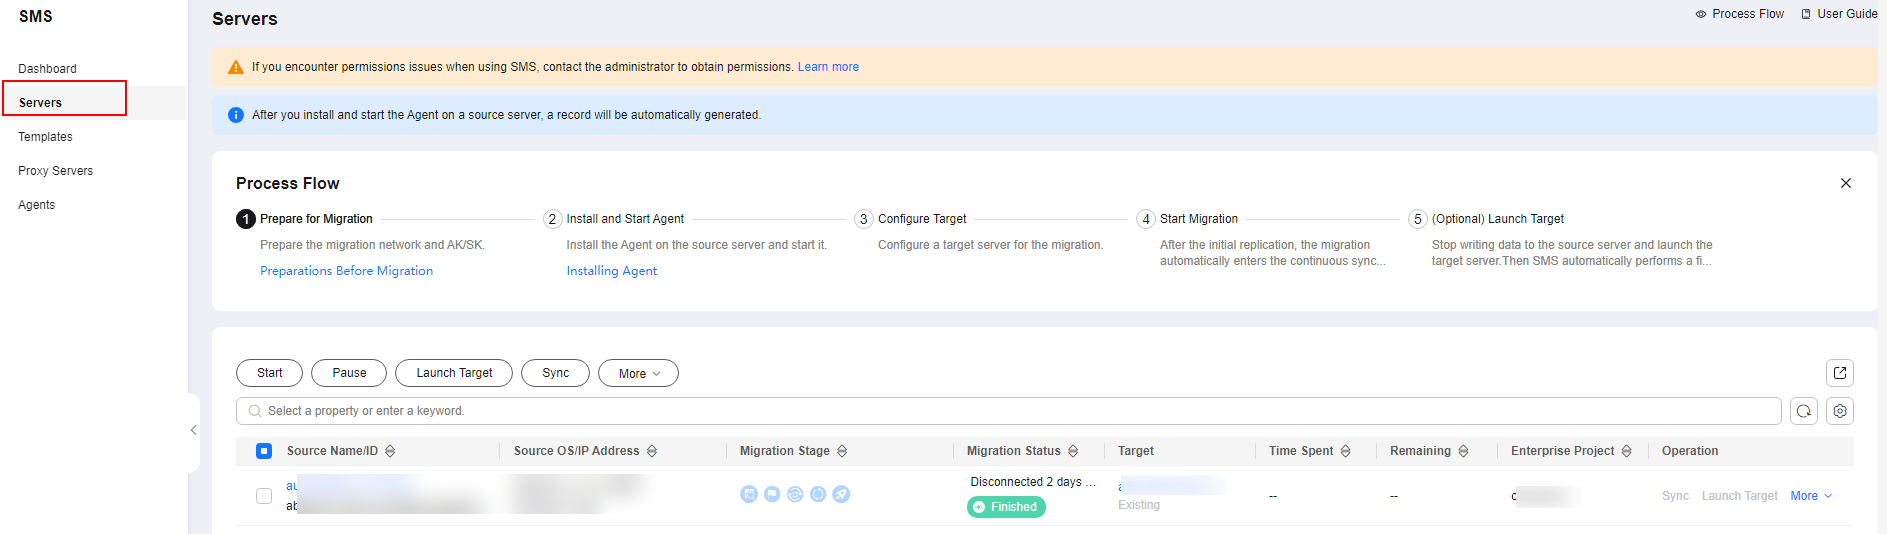
- Locate the desired server in the server list based on the resource name in the MgC migration workflow, and click Configure in the Target column.
- Select Configure now next to Advanced Settings.
- Click Resize Partition next to Partition Resizing.
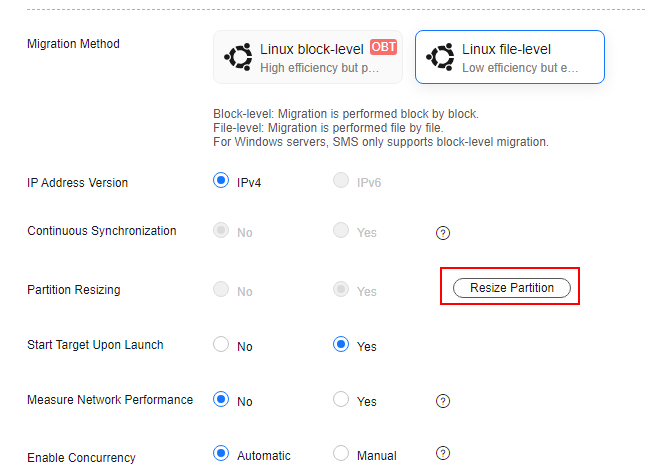
- Adjust the disk size, disk quantity, and partition size based on the target server specifications configured in the workflow. Figure 1 Resizing disks and partitions on Linux
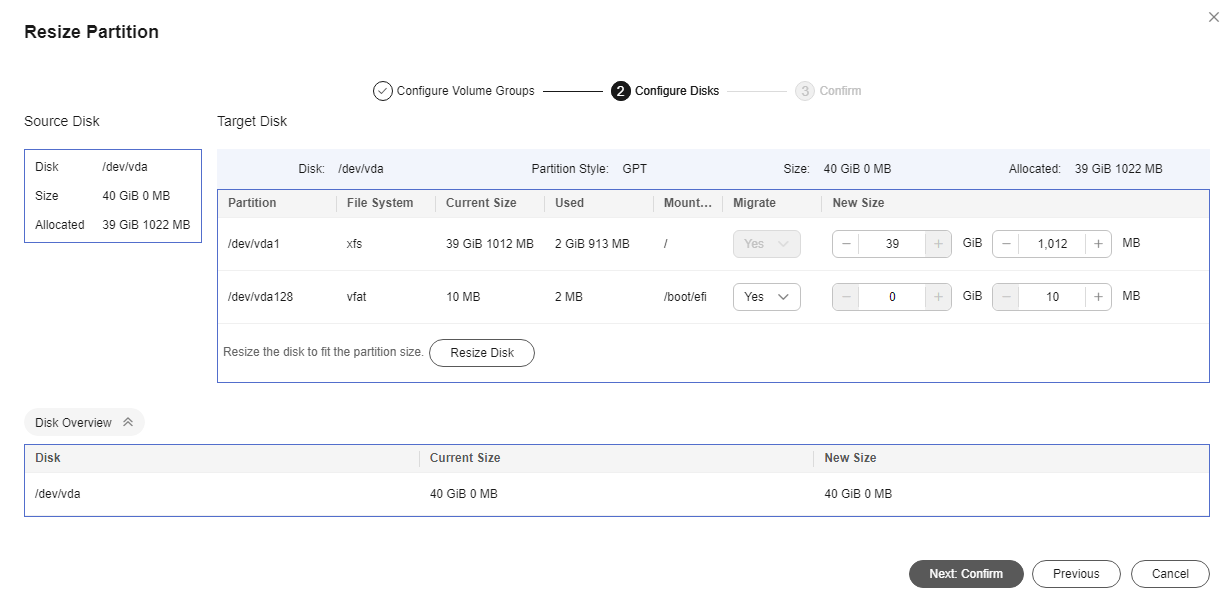

- For a Linux server using LVM, you can choose whether to migrate physical or logical volumes and resize the paired target volumes.
- Partition resizing is not available for Btrfs partitions on Linux.
- In a Linux migration, the system and swap partitions are migrated by default.
- You can choose to migrate all or none volume groups by configuring Migrate All Volume Groups.
- If you choose to migrate none of the logical volumes in a volume group, their physical volumes will not be migrated by default.
- After the configuration is completed, click Next: Confirm. After confirming that the configuration is correct, click OK.
- Click Next: Configure Target in the lower right corner.
- In the server list, select the target server paired with the source server and click Next: Confirm. You can view the name of the target server by clicking the CreateTargetServer step in the MgC migration workflow.
- After confirming that the configuration is correct, click Save. Read the migration checklist carefully and click OK.
- Return to the MgC migration workflow. Locate the ResizeDiskPartition step, and click Confirm next to the step status to continue the subsequent migration steps.
What is your overall rating for this page?
0
1
2
3
4
5
6
7
8
9
10
Very dissatisfiedVery satisfied
Thank you very much for your feedback. We will continue working to improve the documentation.
The system is busy. Please try again later.


