
Proxy Server Configuration
You configure a proxy server for OBS Browser+. OBS Browser+ then uses this proxy server to access the Internet. This enables more secure and efficient access to network resources.
What Is a Proxy Server?
Normally, a computer connects directly to a website or server. However, when a proxy server is configured, the computer sends all network requests to the proxy server. The proxy server then forwards these requests to the target website and returns the responses to the computer.
Benefits of using a proxy:
- Enhanced security and privacy: The target website sees the information of the proxy server, instead of the actual information of the computer.
- Controlled access to specific resources. In some network environments (such as the intranets of companies or schools), you must use a proxy to access external or some internal resources.
Parameters for Configuring a Proxy Server
| Parameter | Mandatory (Yes/No) | Description | Example Value |
|---|---|---|---|
| Address | Yes | Proxy server address | proxy.example.com |
| Port | Yes | Port for connecting to the server | 8080 |
| Identity Authentication | No | Whether the username and password are required for login | Select this option. |
| Username | No | Username used for proxy identity authentication | admin |
| Password | No | Password used for proxy identity authentication | 123456 |
Procedure
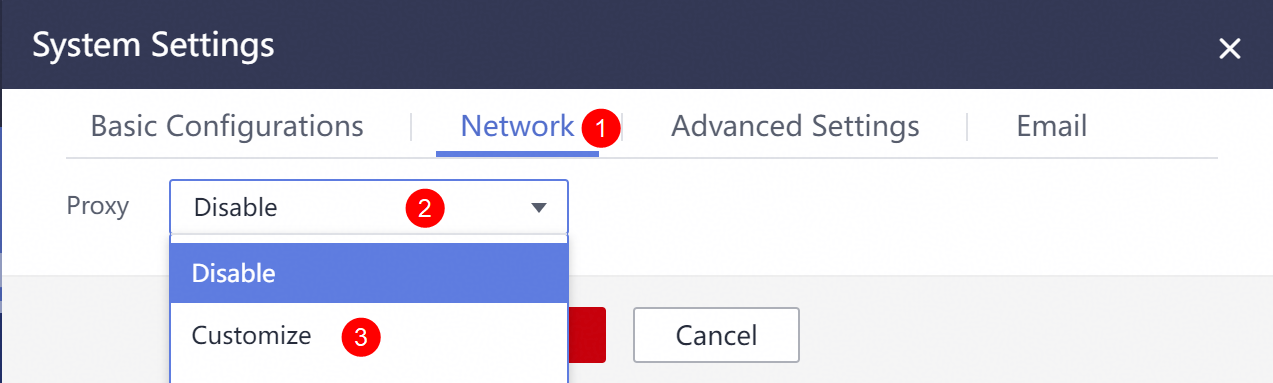
- Log in to OBS Browser+ and choose Settings > Network.
- Choose Customize from the Proxy drop-down list. Figure 1 System settings
- Enter the address and port number of the proxy, for example, proxy.company.com and 8080. Figure 2 Entering the address and port number
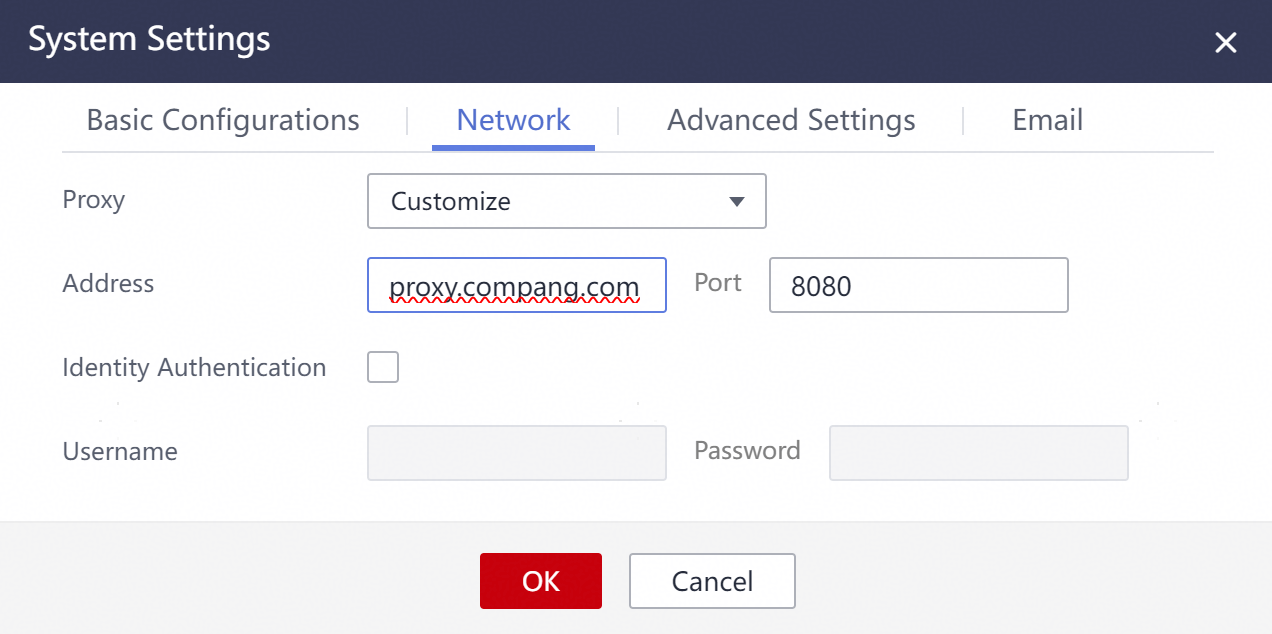
- (Optional) Select Identity Authentication and enter the username and password, for example, admin and 123456. Figure 3 Entering the username and password

- Click OK.
Feedback
Was this page helpful?
Provide feedbackThank you very much for your feedback. We will continue working to improve the documentation.


